Help Documentation
WS Newsletter
By website-shelter | newsletter@websiteshelter.org | Get notified about new productsTable of contents
- What's inside the downloaded file?
- Layouts
- PSD File
- HTML Customization
- Sending The Newsletter
- Using Gesture Newsletter in Mailchimp
- Fonts
- Credits
- Update Log
- Finally
1- What's inside the downloaded file?
- Newsletter folder which contains 12 folders of Color themes, each one of them has 10 ready to use HTML newsletter pages and images folder.
- PSD folder which contains Elements.psd (a full layered
Photoshop file which contains all layout graphic elements).
- Help folder which contains this help documentation and
related images. You are viewing it now:)
2- Layouts
Enjoy the included 10 layouts in each color theme. Here is fast explanation for some layout features :Layout 1 : the borders of the last 2 columns are always matching no matter if one of your content is taller than the other, (look at figure 1), I added 2 extra lines at the left column, still the right column background and bottom border matches the left one. The same method used in all layouts which contains multi columns in row, except layout 2 and 3.
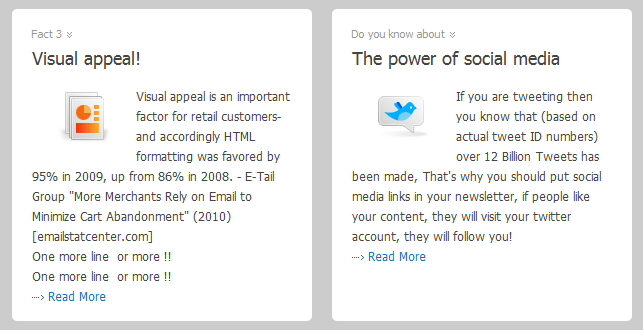
Figure 1
Layout 2 - 3 : at the bottom you can see 2 columns, those columns ends doesn't match, if you write more text in any of them then you will have one taller column than the other, look at figure 2.
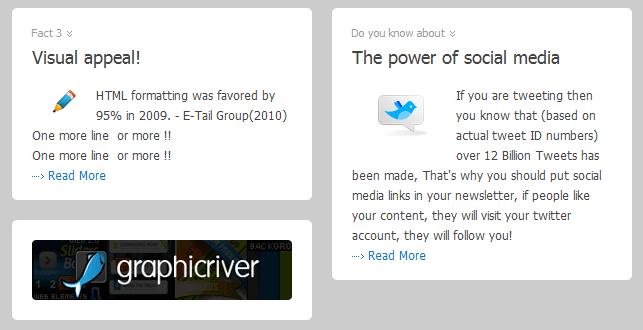
Figure 2
Layout 6 - 7 : Sidebar height is always matching the other side height, so you never get messy look of your newsletter, (look at figure 3).
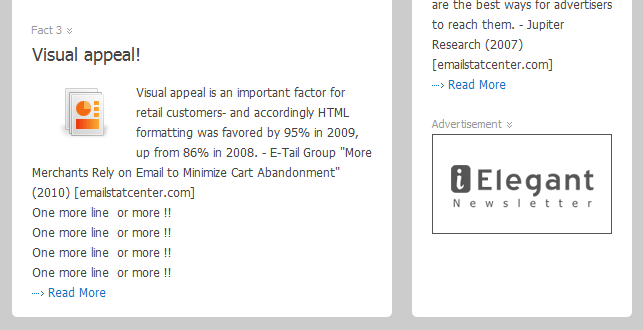
Figure 3
3- PSD file
Elements.psd
This file contains elements you will need in case you decided to change theme colors. Lets discover the PSD file :Open Elements.psd, it has all themes as folders (shown in figure 1), clicking on the empty box left side of the theme folder will make that folder layers visible as shown in figure 2 (you can also make the folder and its content visible by selecting that folder and choosing show layers from the layers menu)

Figure 4 Layers
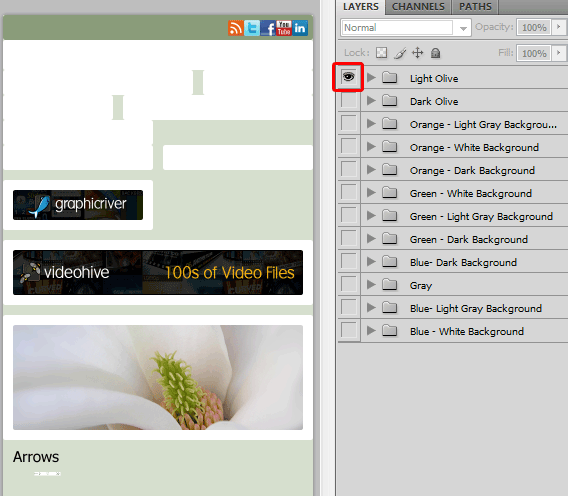
Figure 5 Visible Light Olive theme folder
This PSD has 23 user slices, if you decided to change the colors or create new theme you will have to save those 23 slices as shown in figure 3, by default slices will be saved as PNG-8 (256 colors) images except "MainPicture" the Magnolia flower picture will be saved as JPEG with quality 80% . By default all slices will be saved with names I specified while creating them, which means you don't have to rename them.
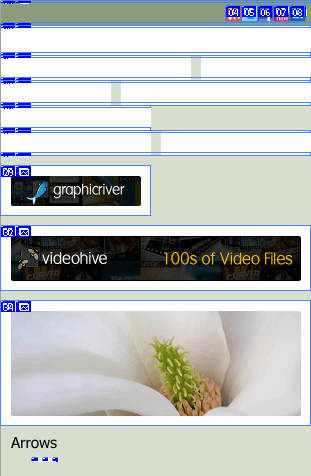
Figure 6 user slices
Tip: Images have to be in the root of "images" folder located in each theme.
Tip: You can select save to web & devices then select save All User Slices (which I created, not including slices the program created!) as shown in figure 4

Figure 7 choose all user slices in save to web dialog box
Tip: In case you decided to replace the Magnolia picture with any other picture:
1- Pace your picture in new layer just above the Magnolia layer
2- Delete the Magnolia layer
3- Right click on the new layer you created and choose "Create Clipping Mask
4- HTML Customization
- Replace the top logo with your own logo, current logo dimensions are: 300px width and 80px height. Don't exceed 300px width for logo.
- Each row highlighted with comments showing its start
and end, so you can easy delete or duplicate any of them
.. Here is a screenshot (figure 5) made in Firefox showing one of the
newsletters HTML page source .. you can see the green comments explaining
where content starts and ends, if you decided to add a row or more just
copy what's between the green comments and paste it! for example you want to
insert extra row between the second and third rows, copy from the
green line <!-- Start of First Content--> to the green line
<!-- End of Second Content --> and paste
it after <!-- End of Second Content --> with this easy copy and paste method you
can insert extra rows or delete them if you want.

Figure 8 page source
Tip: It's not necessary that source code will be shown with such colors in your HTML/Text editor! If it's shown in black just search for <!-- that's how all comments start. - Despite that you can add/remove row or more, you can't add/remove columns
inside the row. Each column
inside row highlighted with code comments explains its position in the
row for example:
<!-- Start of right Column --> or <!-- Start of Second column from three -->
Question: How can I duplicate any row which contains more than one column?
Answer: Follow the same method as if the row containing single column, copy from the line where it says start of row till the line where it says end of row. - Content rows are made in compatible way to copy and paste them
between layouts, for example you can copy the row which contains three
columns in layout 4 and paste it in layout 10 after the letter row.
Remember: don't copy just one column from two or three columns, rather copy the whole row from layout to another. - Remember always to test the newsletter in your browser to make sure you have updated all paragraphs, top links, company information & unsubscribe link.
5- Sending The Newsletter
If you are planning to use this newsletter in Mailchimp please skip to the next title "Using Fresh Newsletter in Mailchimp"- You can send the newsletter using your preferred service, if you never sent HTML newsletter before you can start using for example Mozilla Thunderbird https://www.mozillamessaging.com/thunderbird/ you can get it for free. Refer to your email service provider how to use your email with Thunderbird.
- You have to make all images locations in HTML contain the full absolute path
not the short one.. here is
how to do it: open it in
your browser, right click on any image in the newsletter, choose View Image Info, look at the Location of the image which will be something like:
file:///C:/Newsletter/images/Logo.png copy all the location except the image name itself (copy the underlined part only), then open the newsletter HTML and make search and replace each
images/ with
file:///C:/Newsletter/images/. Now we have the full absolute path of
newsletter images not the short path.
Reminder: The green location above and the red border location below is for explanation only, in your PC/Mac it will be different based on where you have the newsletter folder it in your PC/Mac.
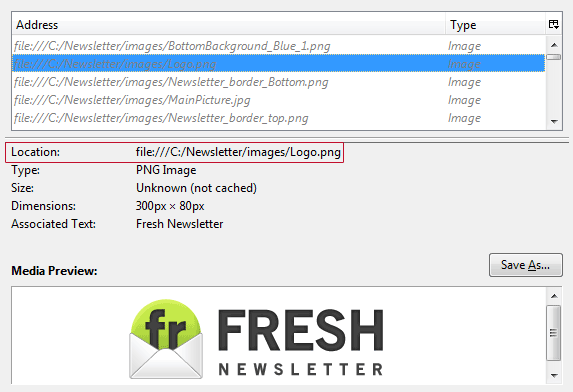
Figure 9 shows the image info window in Firefox but the location of newsletter images absolutely will be different than mine based on where you have it in your PC/Mac and folder name)
- Open the page again in your browser, all images seen? go to the next step. If not then make sure you copied the entire location correctly and you didn't forget any /, one more thing .. if you edited the newsletter and used images and didn't place it in the images folder where I put all images, then you have different location for those images, you will have to specify their correct full absolute path in the code.
- Copy all the HTML code and open Thunderbird , choose write, then click in the email body to activate the Thunderbird top menu and choose insert, then HTML, paste the code and click insert.
- Now you can edit the newsletter content, double clicking on any link or picture will allow you to change them. All text areas are editable as well.
6- Using Fresh Newsletter in Mailchimp
-
Open the layout you wish to use in any HTML or text editor then search for
<body link="#777777" vlink="#777777"> and replace it with
<body link="#777777" vlink="#777777" mc:edit > then save the file. - Take that layout and zip it with the images folder.
- Go to Mailchimp click on my templates button, code custom templates, import zip file.
Here are the locations of these buttons:
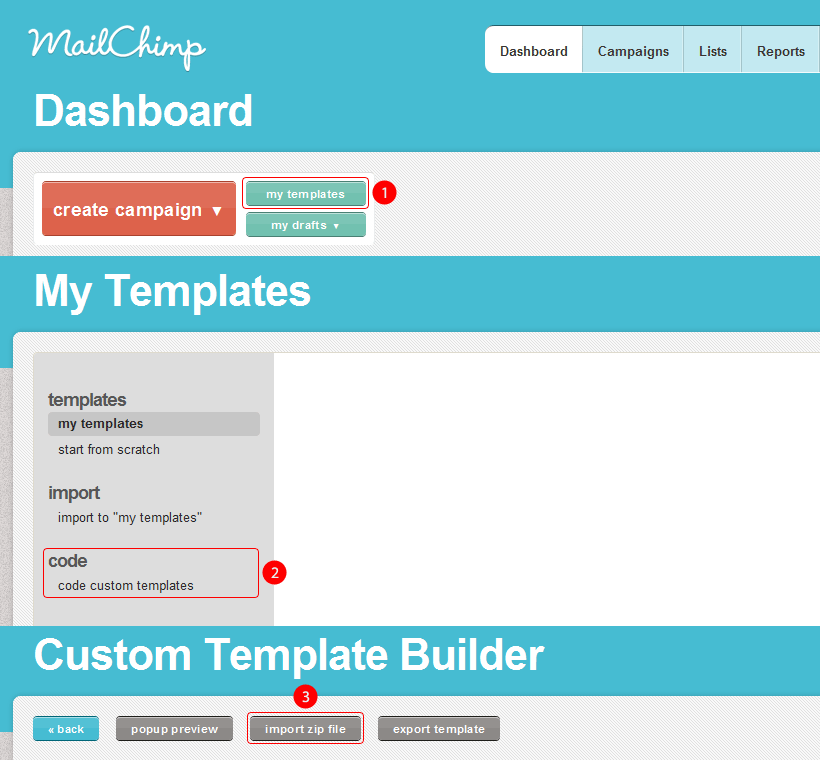
Make that process each time you want to upload a template, you can upload only 1 single HTML page and 1 images folder each time.
7- Fonts
Tahoma is the main font.In case you like the font I used in the logo, its "Old Sans Black", it's free font you can download it from : https://www.dafont.com/old-sans-black.font
8- Credits
I used many free icons in this newsletter, this free icons are created by dellustrations.com, Andy Gongea, IconShock, Emre Ozcelik, Benjamin Reid, and icojoy.Picture of Magnolia flower by richard_b.
9- Update Log
Version 1.2:
- Improved the code for users who are sending the newsletter from Outlook 2007 - 2010 to eliminate any border gaps.
-
Updated the documentation with the latest instructions for using the newsletter in Mailchimp.
Version 1.1:
- Added support for Outlook 2007 and Outlook 2010 (beta) running in higher than
default DPI.
Finally
Thank you for purchasing this newsletter, hope I explained everything clearly and it's not too hard to be understood.Please rate this newsletter so other people will know if it's useful or not.
If you have any questions that are beyond the scope of this help file, please feel free to email via my user page contact form here. or email me directly : newsletter@websiteshelter.org